Foldy WWII Hat Part I
Ah, to be a hat upon that head!
Garrison Cap
Yeah, I would totally make a believable WWII vet! But I decided to make a garrison cap. Mine is muslin, since I don't have a lot of olive drab wool lying around the house. So first, I made some piping. They didn't all have have piping, but an off-white muslin hat with no piping will look like nothing.This is a pretty good tutorial on how to make piping, with advice on how to dial it in when you don't do it perfectly on the first try.
Here is a pretty sweet website with actual, historical garrison caps, and zoomable pictures of the insides, so you can see the construction, at least partially.
My head measurement is 22.5 inches, so I made what I will refer to as the "brim" that length, plus six inches on each side to account for the overlap in front. Here's the two pieces of the brim and the piping before putting the string in the middle. I cut two brims.
I used this string, since I wanted a very thin piping. So, having made your piping, and made it longer than you expect to need, just in case, attach it between the two pieces of the brim.
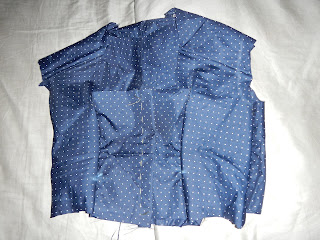
I then basted the bottom of the brim together in preparation for attaching it to the rest of the hat. I didn't know how high the hat would sit on my head, so I basically just made a square bag 12 inches by 12 inches, and left it open at both ends in preparation for attaching the top of the cap later, after the height was eyeballed.
So I attached the brim to the bag.
This is just the same step from two different angles. The bag is right side out, and the brim is right side out, making sure to keep it with the left side over the right. Then I just round stitched it together. The plan is to scootch the seam up inside the hat, and then cover it with the band. I'm going to have to go dig up my iron, and I will continue with this project on Wednesday.
http://allofthecostumes.blogspot.com/2018/07/foldy-wwii-hat-part-ii.html


Comments
Post a Comment